Microcement Application
Guide

8-9 minutes time reading

TOPCRET MICROCEMENT

Microcement Application

If you're considering using microcement in your next project, it's important to know the proper application techniques to achieve the desired results. This comprehensive guide will walk you through the step-by-step process of applying microcement, whether it's on floors, walls, bathrooms or swimming pools.

How to Apply Microcement: A Comprehensive Guide

Microcement is a versatile and durable material that can be applied to various surfaces, including floors, walls, bathrooms and swimming pools. With the right techniques and tools, anyone can achieve a flawless finish that can last for years.

In this comprehensive guide, we will explore the step-by-step process for applying microcement, including tips and techniques for different surfaces.

Project: CLARA

Microcement Application: Step-by-Step Guide

Before starting the application process, it is crucial to prepare the surface properly. The surface should be clean, dry, and free from any dirt, grease, or debris. Any imperfections should be repaired, and the surface should be primed. 

Here are the steps for applying microcement:

1 | Base Coat Application

Apply the base coat of microcement with a trowel, making sure to cover the entire surface evenly. Let it dry for at least 24 hours.

2 | Second Coat Application

Apply the second coat of microcement with a trowel, in the opposite direction of the first coat. Let it dry for at least 24 hours.

3 | Sanding

Sand the surface with a fine-grit sandpaper to smooth out any imperfections.

4 | Sealing

Apply a sealer to protect the surface and enhance its durability.

Applying Microcement: Detailed Steps

Base Coat Application:
The first step in applying microcement is preparing the surface and applying the base coat. This coat acts as a foundation and ensures proper adhesion of the microcement. Here’s how to do it:

  • Clean the surface thoroughly to remove any dust, dirt, or grease.
  • Apply a primer to improve the bonding between the substrate and the microcement.
  • Mix the base coat material according to the manufacturer’s instructions.
  • Use a trowel or a spatula to apply the base coat evenly onto the surface.
  • Allow the base coat to dry completely before moving on to the next step.


Second Coat Application:
Once the base coat is dry, it’s time to apply the second coat of microcement. This coat will provide the desired color and texture to the surface. Follow these steps:

  • Mix the microcement material, pigment, and water according to the manufacturer’s instructions.
  • Apply the second coat of microcement using a trowel or a spatula.
  • Spread the microcement evenly, making sure to achieve the desired thickness.
  • Smooth out the surface using a steel trowel or a finishing trowel.
  • Allow the second coat to dry for the recommended time before proceeding to the next step.


Sanding:

After the second coat has dried, sanding is necessary to achieve a smooth and even surface. Here’s what you should do:

  • Use a sanding block or a sanding machine with fine-grit sandpaper.
  • Gently sand the surface in circular motions, paying attention to any uneven areas.
  • Remove the dust created during the sanding process using a vacuum cleaner or a damp cloth.
  • Inspect the surface to ensure it is smooth and ready for the final step.


Sealing:
The final step in the microcement application process is sealing the surface. Sealing protects the microcement from stains, water damage, and enhances its durability. Follow these steps to seal the microcement:

  • Apply a coat of sealer using a roller or a brush, following the manufacturer’s instructions.
  • Allow the sealer to dry completely before applying additional coats if necessary.
  • Apply multiple coats of sealer to achieve the desired level of protection.
  • Leave the sealed surface to cure for the recommended time before subjecting it to heavy use or cleaning.

How to Apply Microcement on Walls

Microcement can be applied on both interior and exterior walls. Here are the steps for applying microcement on walls:

  1. Surface Preparation: Start by preparing the walls for microcement application. Ensure that the surface is clean, dry, and free from any dirt, grease, or loose particles. Remove any existing paint or coatings that may hinder adhesion. Repair any cracks or imperfections on the walls using a suitable filler or patching compound.
  2. Priming: Apply a suitable primer designed for microcement onto the prepared walls. The primer helps to improve adhesion and create a better bonding surface for the microcement. Use a roller or a brush to apply the primer evenly, following the manufacturer’s instructions. Allow the primer to dry thoroughly.
  3. Base Coat Application: Mix the microcement material with water and any desired pigments according to the manufacturer’s instructions. Achieve a smooth and workable consistency. Using a stainless steel trowel or a spatula, apply the base coat of microcement onto the primed walls. Work in small sections, spreading the microcement evenly and maintaining a consistent thickness.
  4. Even Spread and Texture: While the microcement is still wet, use a steel trowel or a finishing trowel to achieve the desired texture and finish. Experiment with different techniques to create unique patterns or textures. Pay attention to corners, edges, and other challenging areas to ensure a seamless look. Continuously monitor the thickness and texture of the microcement to maintain consistency.
  5. Drying Time: Allow the base coat of microcement to dry for the recommended time. The drying time may vary depending on factors such as humidity and temperature. It is essential to ensure that the microcement is completely dry before proceeding to the next step.
  6. Sanding and Smoothing: Once the base coat has dried, gently sand the surface of the microcement using fine-grit sandpaper. This step helps to smooth out any imperfections and achieve a uniform finish. Remove any dust or debris resulting from sanding.
  7. Second Coat Application: Apply a second coat of microcement onto the sanded and cleaned surface. Follow the same techniques used for the base coat application, ensuring an even spread and desired texture. Smooth out the surface using a trowel to achieve a consistent appearance.
  8. Drying and Curing: Allow the second coat of microcement to dry and cure for the recommended time. This step is crucial for the microcement to fully set and harden. Follow the manufacturer’s instructions regarding the drying and curing time to ensure optimal results.
  9. Sealing: Once the microcement has completely dried and cured, apply a suitable sealer to protect the surface and enhance its durability. Use a roller or a brush to evenly apply the sealer, ensuring complete coverage. Allow the sealer to dry according to the manufacturer’s instructions.


Remember, microcement application on walls requires skill and precision. If you’re unsure about the process or want to ensure professional results, it’s recommended to seek the services of experienced microcement installers who can provide expert guidance and achieve the desired finish.

Topcret’s team of professionals can assist you in achieving the perfect microcement finish on your walls. With their expertise, they can handle the entire application process, from surface preparation to the final sealing, ensuring a high-quality and stunning result.

By following these steps and seeking professional assistance if needed, you can successfully apply microcement on your walls and enjoy a durable, versatile, and aesthetically pleasing finish that will elevate the look of your space.

Microcement Application on Walls: Interior and Exterior Walls

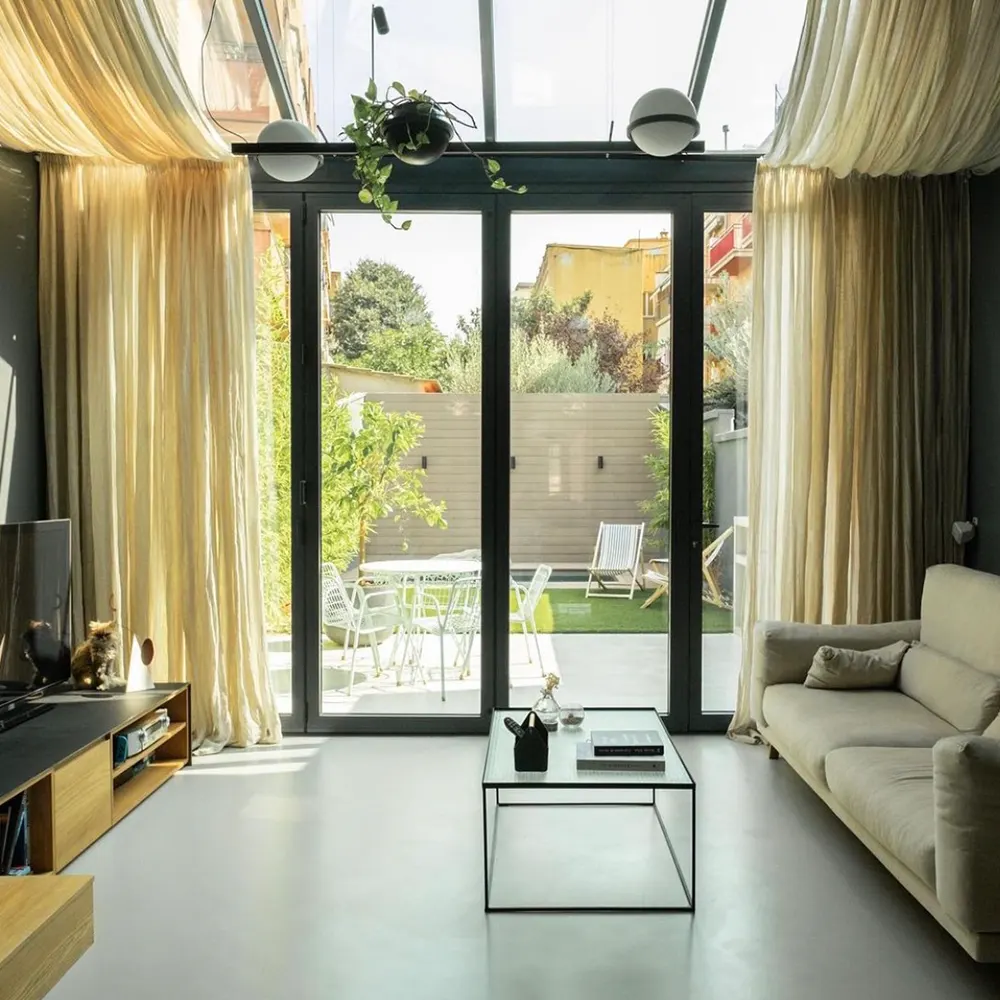
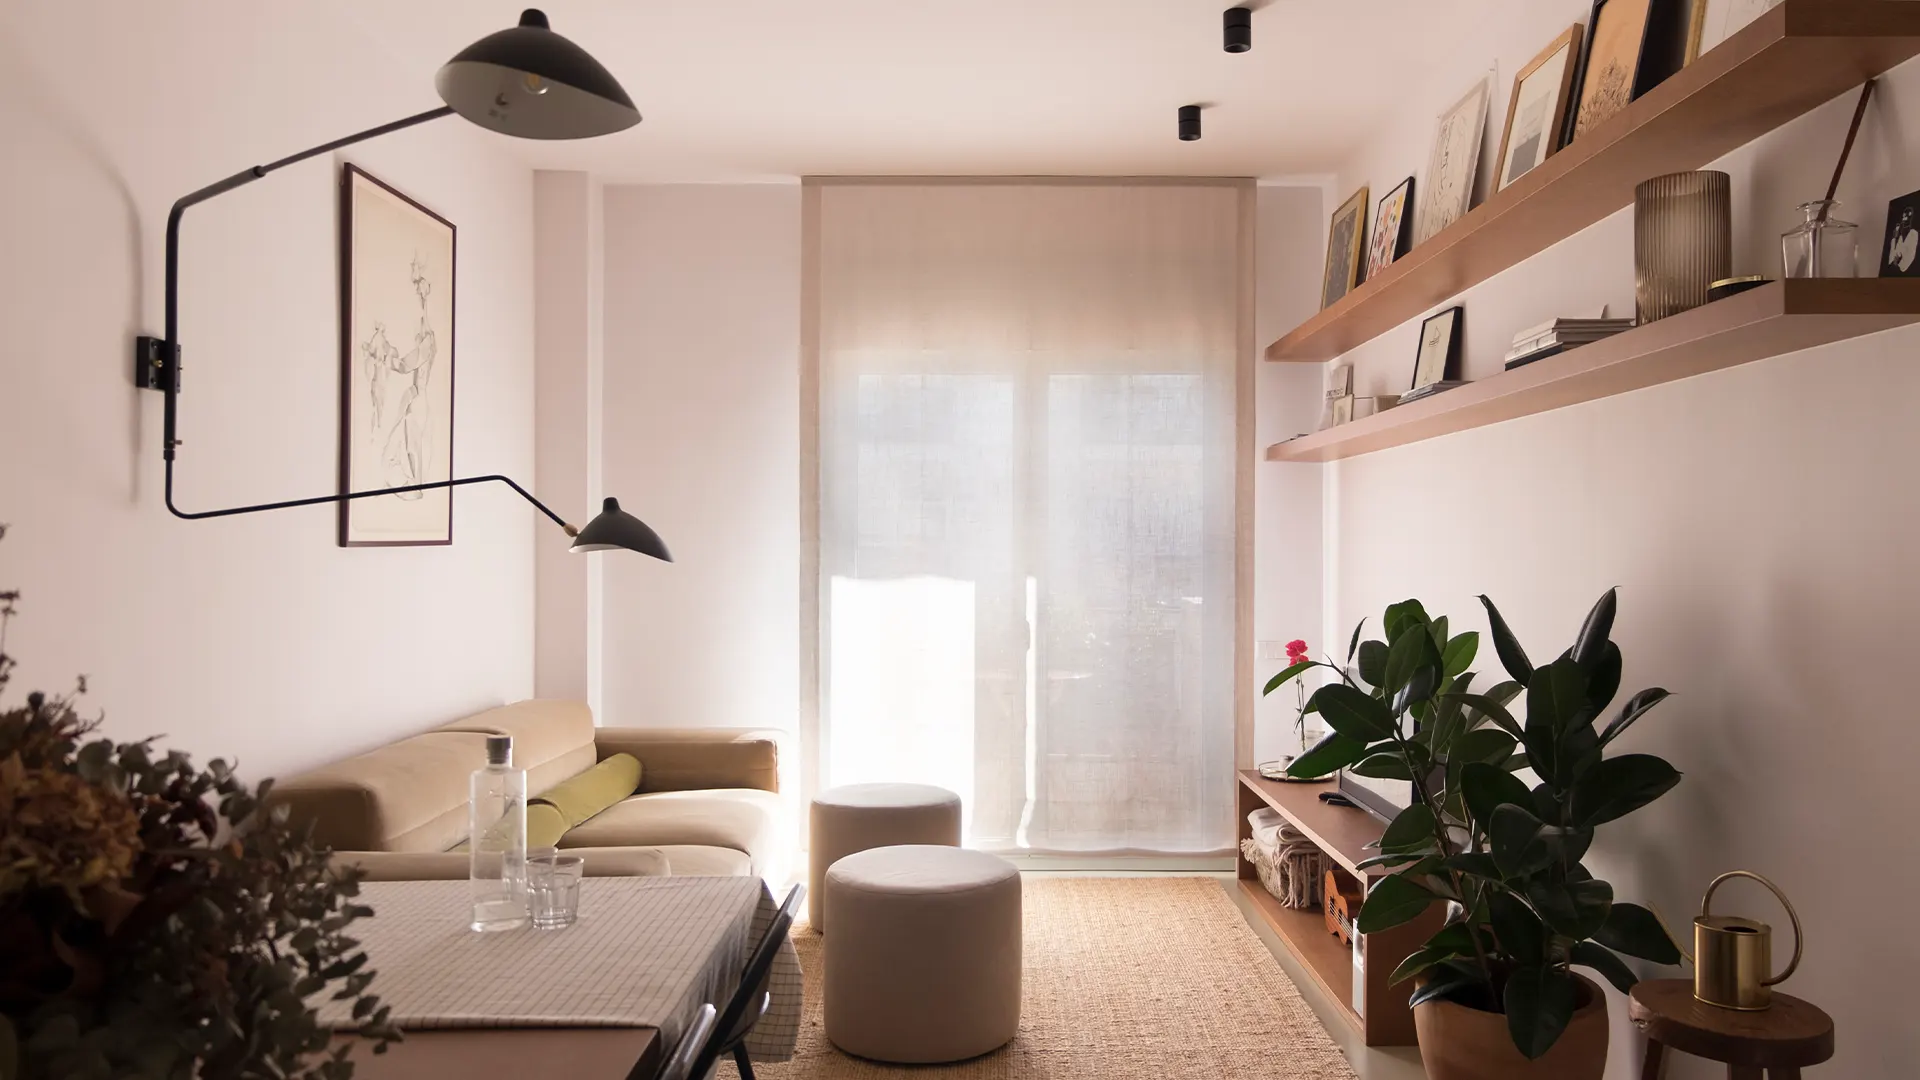
Microcement is also a great choice for interior and exterior walls. To apply microcement to walls, begin by preparing the surface by cleaning and repairing any imperfections. Once the surface is clean and dry, apply a primer and let it dry completely.

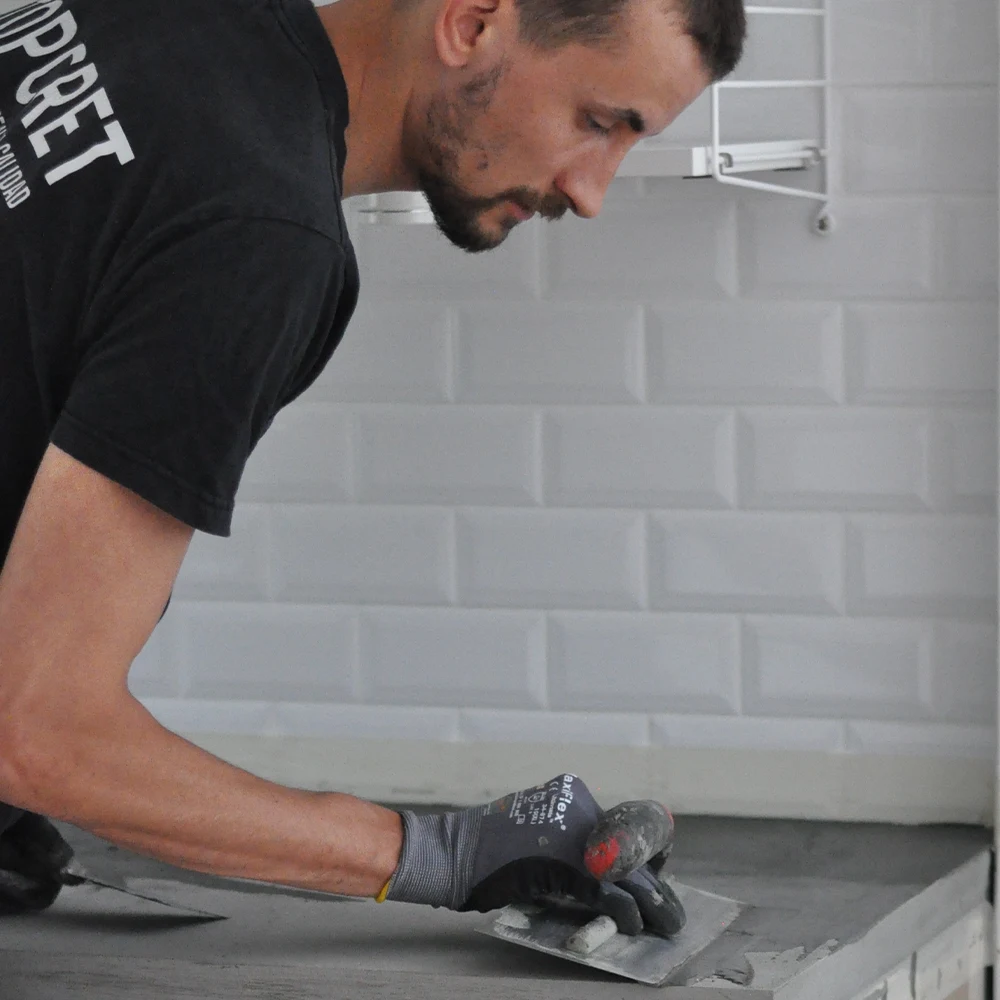
Next, use a trowel to apply the first coat of microcement evenly over the entire surface of the wall. Allow the first coat to dry for at least 24 hours before applying the second coat in the opposite direction. After the second coat has dried, use a fine-grit sandpaper to smooth out any imperfections.

Finally, apply a sealer to protect the surface and enhance its durability. With proper application and maintenance, microcement can provide a beautiful and long-lasting finish for your walls.

How to Apply Microcement on Floors

Microcement can be applied on both indoor and outdoor floors. The process is similar to the general application process, but some additional steps may be required for outdoor floors . Here are the steps for applying microcement on floors:


Preparing the Surface

Before applying microcement, it is crucial to properly prepare the surface to ensure a successful installation. The following steps will help you prepare your floor for microcement application:

  • Cleaning the Floor: Start by thoroughly cleaning the floor to remove any dirt, dust, or grease. Sweep the surface to remove loose debris and use a suitable cleaner to remove any stains or contaminants. Make sure the floor is completely dry before proceeding to the next step
  • Repairing Cracks and Imperfections: Inspect the floor for any cracks, holes, or imperfections. Fill these areas with a suitable repair compound and allow it to dry completely. Smooth out the repaired areas using sandpaper or a sander, ensuring a level surface.
  • Priming the Surface: To promote adhesion, it’s essential to apply a primer to the prepared floor. Choose a primer specifically designed for microcement and follow the manufacturer’s instructions for application. Allow the primer to dry thoroughly before moving on to the next step.


Applying the Microcement
Now that the surface is properly prepared, it’s time to apply the microcement. This process typically involves several coats to achieve the desired finish. Follow these steps for a successful microcement application:

  • Mixing the Microcement: Start by carefully measuring and mixing the microcement according to the manufacturer’s instructions. It’s crucial to achieve the right consistency to ensure proper adhesion and workability. Use a paddle mixer or a drill with a mixing attachment to achieve a smooth and lump-free mixture.
  • Applying the Base Coat: Apply the first coat, known as the base coat, using a steel trowel or a microcement trowel. Spread the microcement evenly across the floor, working in small sections. Use long, sweeping motions to achieve a thin and uniform layer. Allow the base coat to dry according to the manufacturer’s recommendations.
  • Applying the Decorative Coat: Once the base coat is dry, apply the decorative coat of microcement. This layer adds texture and color to the floor. Apply the decorative coat using a trowel or a spatula, depending on the desired texture. Work in small sections and apply the microcement evenly, paying attention to create the desired pattern or design. Allow the decorative coat to dry completely.


Finishing and Sealing the Microcement
After the microcement has dried, it’s time to finish and seal the surface. This step enhances the appearance of the microcement and protects it from stains and wear. Follow these steps to finish and seal the microcement:

  • Sanding the Surface: Carefully sand the microcement surface using fine-grit sandpaper or a sanding block. This step helps to smooth out any imperfections and achieve a uniform finish. Clean the surface thoroughly to remove any dust or debris generated during the sanding process.
  • Applying the Sealer: Apply a high-quality sealer specifically designed for microcement. Use a roller or a brush to evenly apply the sealer, working in small sections. Allow the sealer to dry completely between coats and follow the manufacturer’s instructions for the recommended number of coats. The sealer provides protection and enhances the durability of the microcement.


Curing and Maintenance

After completing the microcement application and sealing process, it’s essential to allow the microcement to cure and establish its full strength. Follow these guidelines for curing and maintaining your microcement floor

  • Allowing the Microcement to Cure: It typically takes several days for the microcement to fully cure. Avoid heavy traffic or placing heavy objects on the floor during this period. Follow the manufacturer’s recommendations for curing time and avoid exposing the floor to excessive moisture.
  • Regular Cleaning and Maintenance: To keep your microcement floor in optimal condition, regular cleaning and maintenance are essential. Sweep or vacuum the floor regularly to remove loose debris. Use a neutral pH cleaner and a microfiber mop to clean the surface. Avoid using abrasive cleaners or tools that could damage the microcement.

Indoor and Outdoor Floor Microcement Application

Microcement is a versatile material that can be used on both indoor and outdoor floors. While the application process is similar, there are some additional steps to consider for outdoor floors.

Before applying microcement, it’s important to properly prepare the surface by cleaning and repairing any imperfections. Next, apply a primer to the surface and allow it to dry. Once the primer has dried, use a trowel to apply the first coat of microcement evenly over the entire surface. Allow the first coat to dry for at least 24 hours before applying the second coat in the opposite direction.

Once both coats have dried, use a fine-grit sandpaper to smooth out any imperfections before applying a sealer to protect and enhance the durability of the surface.

Microcement is a versatile and durable finish that can be used on floors, walls, and even swimming pools.

How to Apply Microcement in Bathrooms

Applying microcement in a bathroom requires a meticulous approach, but the results can be truly stunning. The process begins with preparing the surface, ensuring it is clean, dry, and free from any dirt, grease, or debris. Any imperfections should be repaired, and the surface should be primed.


  1. The first step in the application process is the base coat. Using a trowel, apply the base coat of microcement, ensuring to cover the entire surface evenly. This coat should be left to dry for at least 24 hours.
  2. Following this, a second coat of microcement is applied, this time in the opposite direction of the first coat. Again, this should be left to dry for a minimum of 24 hours.
  3. Once the second coat has dried, the surface should be sanded with a fine-grit sandpaper to smooth out any imperfections. This is a critical step in achieving a flawless finish.
  4. The final step in the process is sealing. Apply a sealer to the microcement to protect the surface and enhance its durability. This is particularly important in a bathroom setting, where the surface will be exposed to moisture and humidity.


Remember, the key to a successful microcement application is patience and attention to detail. Each step in the process is crucial and should not be rushed. With the right approach, you can transform your bathroom into a modern, stylish space with a durable and waterproof microcement finish.

How to Apply Microcement in Swimming Pools

Microcement can also be used in swimming pools, providing a waterproof and durable finish. Here are the steps for applying microcement in swimming pools:

  • Clean the pool surface thoroughly to remove any dirt, debris, or algae: Ensure that the surface is clean and free from any contaminants.
  • Apply a specialized primer designed for microcement pools to enhance adhesion: The primer will create a better surface for the microcement to bond with.
  • Spread the microcement base coat evenly on the pool surface using a trowel or a spatula: Work in small sections, ensuring a thin and consistent layer. Allow it to dry completely before proceeding.
  • Apply the second coat of microcement, ensuring an even spread: Use overlapping strokes and work in small sections to achieve a uniform texture. Smooth out the surface with a steel trowel or a finishing trowel.
  • Allow the microcement to dry before applying any additional coatings or treatments: Follow the recommended drying time to ensure proper curing and adhesion.
  • Seal the microcement pool surface using a specialized pool sealer: Apply the sealer evenly, following the manufacturer’s instructions. This step protects the microcement from water damage and enhances its durability.


By following these steps, you can successfully apply microcement to your pool surface, creating a seamless and durable finish. It is important to consult with professionals or experienced installers for guidance or assistance to ensure the best results and the longevity of the microcement pool.

T/Swim Microcement Application for Swimming Pools

If you’re looking for a versatile and durable finish for your swimming pool, T/Swim microcement is an excellent choice. This product is specially designed to withstand the harsh conditions of pool environments, including exposure to water, chemicals, and UV radiation. T/Swim microcement is available in a variety of colours and finishes, so you can create the perfect look for your pool. The application process for T/Swim microcement is similar to that of traditional microcement, but there are some specific considerations to keep in mind. For example, it’s essential to ensure that the substrate is clean, dry, and free of any contaminants. The T/Swim microcement should be applied in thin, even layers, and each layer should be allowed to dry completely before the next one is applied.

Technical Notes for Microcement Application

When it comes to microcement application, there are several technical considerations to keep in mind. One of the most critical factors is substrate preparation. The substrate must be clean, dry, and free of any contaminants, such as oil, grease, or dust. If the substrate is not properly prepared, the microcement may not adhere correctly, resulting in an uneven or patchy finish.

Another essential technical consideration is the mixing of the microcement. It’s important to follow the manufacturer’s instructions carefully and ensure that the microcement is mixed thoroughly to ensure consistent colour and texture.

Finally, the application technique is also crucial. Microcement should be applied in thin, even layers using a trowel or a spray gun.

The layers should be allowed to dry completely before the next layer is applied, and the surface should be sanded lightly between layers to ensure proper adhesion.

Topcret's team of professionals can help you achieve the perfect finish.

Topcret's Professional Microcement Application Services

When it comes to microcement applications, there’s no better option than Topcret’s professional installation services. Topcret is a leading company in the microcement industry, offering not only high-quality products but also expert installation services.

It’s important to note that Topcret’s microcement products are only applied by their team of highly skilled and trained professional installers.

These installers are equipped with the latest techniques, materials, and equipment to ensure a perfect finish every time. By choosing Topcret’s professional application services, you can have peace of mind knowing that your microcement will be installed quickly, efficiently, and with the utmost attention to detail.

Whether you’re looking to install microcement on your floors, walls, or even a swimming pool, Topcret’s team of professionals can help you achieve the perfect finish.

With their expertise, you can trust that your microcement application will not only look beautiful but also last for years to come.

Conclusion

Microcement is a versatile and durable finish that can be used on floors, walls, and even swimming pools. With the right tools, materials, and techniques, you can achieve a flawless finish that will last for years to come.

Whether you choose to apply microcement yourself or use the services of a professional installer, it’s essential to follow the correct application process and consider the technical factors that can affect the final result.

At Topcret, we are committed to providing our customers with the highest quality microcement products and expert installation services.

If you’re interested in microcement for your home or business, contact us today to learn more about our products and services.

FAQs

TOPCRET’s responses.

Yes, microcement is a highly suitable material for kitchens. It’s durable, heat and chemical resistant, waterproof, and comes in a range of colors. Plus, it can be applied over existing surfaces without the need for extensive building work.

Yes, microcement is highly heat-resistant. It can withstand high temperatures without cracking or warping, making it an ideal material for use in kitchens and other high-heat areas.

When applied and maintained correctly, microcement can last for many years. Its durability and resistance to wear and tear make it a long-lasting choice for a variety of surfaces.

Microcement can crack if not applied properly or if the underlying surface is unstable. However, cracks can be repaired.

Yes, microcement is washable. It can be cleaned with mild soap and water.

Yes, microcement is waterproof and can withstand exposure to water without damage.

While it is possible to apply microcement yourself, it is recommended to hire a professional to ensure proper application and avoid mistakes.

Microcement is easy to clean. It can be wiped clean with a damp cloth or mild soap and water.

Yes, microcement is easy to maintain. Regular cleaning and periodic resealing can help prolong its lifespan and maintain its appearance.

Budgets & Inquiries

"*" indicates required fields