Blog / Microcement Over Tiles: The Ultimate Renovation Solution
How to microcement over tiles: step by step guide
Are your old tiles making your space look outdated and dull? Tired of the time-consuming and costly tile removal process?
Discover the revolutionary world of microcement! Microcement is revolutionizing interior design by breathing new life into old tiles.
In this article, we will explore the advantages of using microcement to breathe new life into old tiles. We'll also delve into the steps involved in applying microcement over tiles and the considerations that should be kept in mind.
TOPCRET
8-9 minutes time reading

First of all... Can you put microcement over tiles?
Yes, microcement can be applied over the existing tiles and is an excellent choice for renovating old tiles as it offers exceptional adhesion and enables quick and hassle-free tile transformations without the need for construction. With microcement, you can seamlessly cover existing tiles, providing a modern and stylish update to your space.
Its versatility and durability make it a preferred option for those looking to refresh their tiled surfaces effortlessly.
Advantages of Applying Microcement on Tiles
1. Microcement Can Be Applied Without Extensive Building Work
One of the primary benefits of microcement is its exceptional adhesion and compatibility with various materials, including tiles.
Unlike many other coverings, microcement can be applied directly onto existing tiles, eliminating the need for costly and time-consuming removal work. This not only saves time but also minimizes inconvenience for homeowners and neighbors.
2. Modernization and Multiple Finish Options
Applying microcement on old tiles can completely modernize and transform spaces. With a wide range of microcement textures, varnishes, and colors available, you can achieve multiple finishes that cater to your design preferences. Whether you want a sleek, contemporary look or a rustic feel, microcement offers versatility.
3. Anti-Slip and Waterproof Properties
In areas like bathrooms and kitchens, where moisture and slip hazards are a concern, certain microcements provide anti-slip finishes. This is especially useful when renovating bathroom or kitchen floor tiles. Additionally, microcement can be sealed to achieve waterproof finishes, ensuring durability and protection against environmental humidity and water exposure.
4. Easy Maintenance
Microcement is not only aesthetically pleasing but also easy to maintain and clean. It can withstand the wear and tear of everyday life while maintaining its beauty.
How to Apply Microcement on Tiles in 7 Steps
Step #1: Assessing the Condition of Existing Tiles
Before diving into the microcement application process, it’s imperative to meticulously assess the condition of your existing tiles.
Look out for any imperfections, such as cracks, uneven surfaces, or loose tiles, as addressing these issues is paramount to ensuring a stable substrate for the microcement.
Step #2: Cleaning and Preparing the Tiles
Prepare your tiles for the microcement application by thoroughly cleaning them to eliminate any traces of grease, dust, or other contaminants.
Utilize appropriate cleaning agents and techniques to achieve a pristine surface.
Allow sufficient time for the tiles to dry completely, as proper drying is crucial for ensuring optimal adhesion of the microcement.
Step #3: Filling Tile Joints and Priming
Achieving a smooth and even surface is essential for the success of your microcement project.
Begin by filling the tile joints meticulously to create a seamless base. Subsequently, apply a suitable primer that acts as a bridge between the tiles and the microcement, enhancing adhesion and ensuring a durable finish.
Selecting the right primer tailored to your specific surface is key to achieving optimal results.
Step #4: Apply Fiberglass Mesh and Base Layer
Once the primer has dried, take proactive measures to reinforce the surface by applying a layer of fiberglass mesh.
This additional layer serves to safeguard against potential cracks and reinforces the structural integrity of the microcement coating.
Proceed to apply the first layer of microcement base without pigment, ensuring a uniform application across the surface.
Step #5: Apply Second Coat of Base Microcement
Building upon the foundation laid by the initial base layer, apply a second coat of microcement base, this time pigmented to your desired colour.
Exercise precision and care to achieve a smooth and even application, eliminating any irregularities or imperfections along the way.
Step #6: Seal the Microcement Surface
The final step in the microcement application process involves sealing the surface to protect it from external elements and maintain its appearance over time.
Select a high-quality sealant compatible with microcement surfaces and apply it meticulously to ensure comprehensive coverage.
This sealing layer enhances durability, resistance to wear and tear, and facilitates easy maintenance of the microcement surface.
Step #7: Final Touches and Inspection
Conduct a thorough inspection of the microcement surface to ensure quality and consistency. Address any imperfections or irregularities, and make any necessary final touches to achieve professional-quality results.
By following these comprehensive steps diligently, you can transform your existing tiles with the versatile charm of microcement, achieving stunning and long-lasting results.
Although we’re sharing the process with you, we highly advise seeking assistance from a professional like ours. Here at Topcret, our qualified applicators ensure a seamless renovation, minimizing common microcement problems.
Tips and considerations for Installing Microcement Over Tiles
While microcement offers an innovative solution for renovating tiles, certain considerations must be taken into account.
The existing tile substrate should be in good condition, free from loose tiles, missing sections, and underlying issues. It’s important to address any problems before proceeding with microcement installation.
Let’s explore these considerations while integrating expert advice:
Substrate Assessment: Before commencing the microcement application, assess the condition of your existing tiles. Ensure they are firmly adhered to the surface without any loose or missing sections. Addressing underlying issues beforehand will pave the way for a seamless installation process.
Surface Stability: Whether you’re renovating floors or walls, it’s imperative to verify the stability of the underlying surface. Ensure the floor is free from flexing or uneven areas that could compromise the integrity of the microcement finish.
Proper Surface Preparation: Achieving a flawless microcement finish hinges on meticulous surface preparation. Take the time to fill grout lines, repair imperfections, and create a smooth substrate. This preparatory step lays the foundation for a visually appealing and long-lasting result.
Respect Drying Times: Adhering to specified drying times is crucial for preventing moisture entrapment and achieving optimal results. Consider using moisture-blocking primers to expedite the drying process and mitigate potential issues.
Adequate Drying Period – Allow to dry for 24 hours before applying the second layer: Allow a minimum of 24 hours for the initial microcement layer to dry before applying subsequent coats. This extended drying period minimises the risk of joint markings and ensures a consistent finish across the surface.
Prime the Tiles Before Second Coat of Microcement: For experienced applicators, re-priming microcement-coated tiles 24 hours after the initial application helps equalise absorption levels. This technique reduces visual disparities in joint areas, resulting in a more uniform finish.
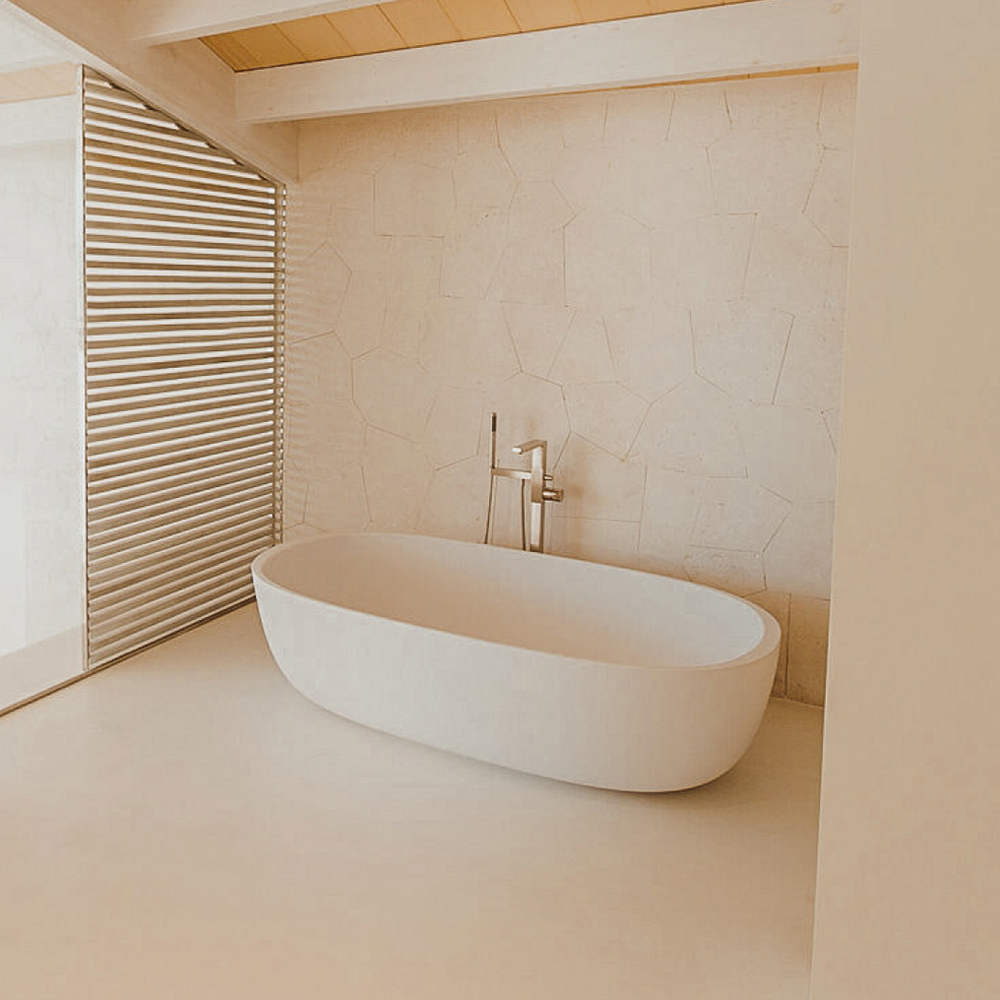
Why Microcement is Ideal for Coating Bathroom and Kitchen Tiles
Before and after bathroom tiles coated with white microcement

Before and after bathroom tiles coated with white microcement
Kitchen front tiles coated with Kiwi colored microcement.


Kitchen front tiles coated with Kiwi colored microcemen.
Microcement is the perfect choice for coating bathroom and kitchen tiles due to several compelling reasons. Apart from its aforementioned advantages, microcement offers a smooth and seamless appearance, enhancing the aesthetics of these spaces. Its easy maintenance and cleaning make it a practical choice for areas prone to splashes and spills.
Scenarios for Installing Microcement Over Tiles
Microcement can be applied over tiles in various scenarios. It’s suitable for kitchen splashbacks and is an excellent option for updating single walls or shower enclosures, especially when fixtures and suites remain unchanged.
Renovate Your Home with Baxab Eco: Applying Microcement on Tiles
Enhance the aesthetics of your living spaces by rejuvenating old tiles with Baxab Eco microcement coating.
This innovative technique allows you to modernize your home without the need for extensive renovations.
Baxab Eco offers continuous and uniform surfaces, ideal for achieving a sleek and contemporary look.
Learn how to apply Baxab Eco on tiles in just a few simple steps to transform your spaces effortlessly.
Conclusion
In conclusion, microcement over tiles offers a modern and convenient solution for renovating your home. Its advantages, such as no demolition, modernization options, and easy maintenance, make it an attractive choice. However, proper surface preparation and professional installation are key to achieving a successful microcement finish.
Microcement is a game-changer in the world of interior design and renovation. Its ability to rejuvenate old tiles with minimal disruption and maximum style makes it a preferred choice for homeowners and professionals alike. Whether you’re considering a makeover for your bathroom, kitchen, or any tiled surface, microcement offers a versatile, durable, and visually stunning solution.
Explore the possibilities of microcement and transform your living spaces with ease.

Tagged Microcement